Replace a worn-out sweep port with a VacPort
If the toe lever on your automatic dustpan has quit, stuck or snapped its spring again, you do not have to buy the same thing a third time. A VacPort goes into the same spot, on the same pipe and the same two wires, and the trim plate that comes with it lines up with the old screw holes and covers the old opening.
Only the A-900-X, A-910-X, A-950-X and AF-10-X include the trim plate.
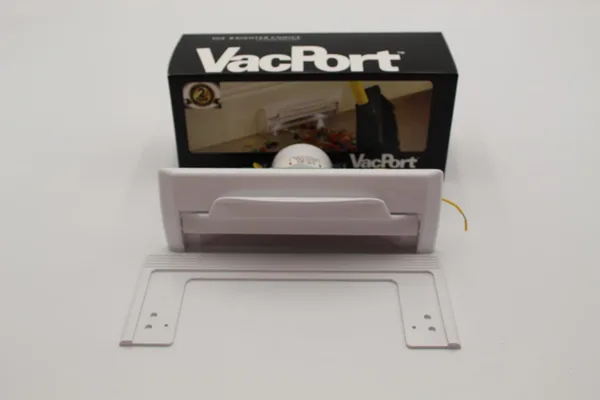
The opening and the trim plate
Source: InterVac manual M-20, VacPort A900/A910, "Replacing the VacPan or Vacu-Sweep with a VacPort installation." The trim plate is also the template for marking the cut-out.
Swapping out a VacPan or Vacu-Sweep
Turn off the central vacuum
Disconnect power to the central vacuum before you start.
Remove the old dust pan
Take out its screws, slide it out of the kick board or baseboard, and disconnect the two low-voltage wires and the hose or pipe behind it.
Screw on the trim plate
Attach the VacPort trim plate to the wall using the existing screw holes: holes A from a removed VacPan, holes B from a removed Vacu-Sweep.
Mark the opening
Trace the inside of the trim plate with a pencil. The opening is 6-1/8 in. wide by 2-1/2 in. high, flush with the floor.
Cut to the line
Take the trim plate off the wall and cut the opening larger along the pencil line.
Put the trim plate back
Screw the trim plate back on the wall.
Connect wires and hose
Connect the two 24V wires under the screw heads, not under the big washer, and leave slack. Connect the 2 in. flex hose or pipe to the back of the VacPort.
Slide the VacPort in and test
Slide the VacPort into the opening and secure it with the #8 flat head screws through holes C. Restore power and open the door. On a 24V DC system, reverse the two wires if it does not start.
The ports people swap out
The VacPort manual covers replacing the VacPan and the Vacu-Sweep, the two most common toe-kick dustpans. Owners also replace unbranded versions of the same spring-lever design.
What they have in common is the toe lever. You press it, it trips the switch, a spring pushes it back. That lever and spring are the wear parts, which is why repair kits containing a new lever and spring are sold for them. A VacPort has no springs at all.
Brand names are used only to describe what a VacPort can replace. InterVac is not affiliated with those companies.
Before you buy, check:
- Your vacuum is not an OVO system
- The port switches the vacuum with two thin low-voltage wires
- There is a pipe or hose behind the old port
- You are ordering a version with the trim plate: A-900-X or A-910-X
Not sure? See compatibility or email [email protected].
Questions
Can I replace a VacPan or Vacu-Sweep with a VacPort?
Yes. The VacPort manual (M-20) has a section for exactly that. You screw the trim plate onto the wall through the holes left by the old dust pan (holes A for a VacPan, holes B for a Vacu-Sweep), trace the inside of the trim plate, cut to the line, and put the trim plate back.
What size opening does a VacPort need?
6-1/8 in. wide by 2-1/2 in. high, flush with the floor. 2-1/2 in. is the minimum height, so you can reach into the cut-out by hand. The trim plate is supplied in case you need more height than that, and it doubles as the template for marking the cut.
Which VacPort comes with the trim plate?
The A-900-X (with LED) and A-910-X (without LED), and the A-950-X and AF-10-X kits. The bare A-901-X, A-902-X and A-911-X do not include one.
Do I need new wires or pipe?
Usually not. Your old port already has a pipe behind it and two low-voltage wires. The VacPort connects to both. If the pipe does not line up, a P-21 elbow, P-30 coupling or a short length of X640 installation hose with D-900-E couplings closes the gap.
The vacuum does not start after I swap it. What now?
Some central vacuums switch on 24V DC rather than AC. Reverse the two low-voltage wires on the VacPort and try again. Also check the wire is under the screw heads, not under the big washer.
Will it work with an OVO central vacuum?
No. The VacPort is not compatible with OVO systems.
My old port is not a VacPan or Vacu-Sweep. Will the trim plate cover it?
Email a photo with a tape measure across the opening to [email protected] before you order and we will tell you what fits.
One port, not another repair kit.
Pick the A-900-X or A-910-X. The trim plate is in the box.